Introduction
Use Outlook's Tasks folder to keep track of things you need to do, such as steps for
completing a project or arranging an event. Tasks can be as complex as a year-long
project or as simple as a shopping list you need to fill in on the way home. A task
list can include things such as writing a letter, making a phone call, or distributing a memo.
|
Step 1: Open the Task Dialog Box

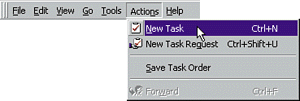
From the Tasks folder, open the Actions menu and select New Task, or click the
New Task button on the toolbar.
|
Step 2: Enter a Title

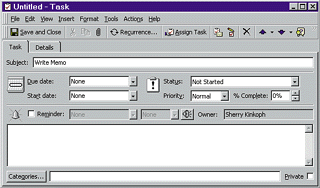
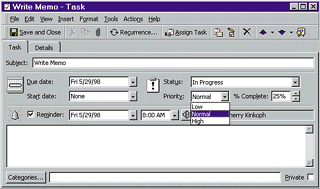
The Task window, like the Appointment window, is a form you can fill out detailing
the task. With the Task tab displayed, enter the subject or title of the task in the
Subject text box.
|
Step 3: Enter a Due Date

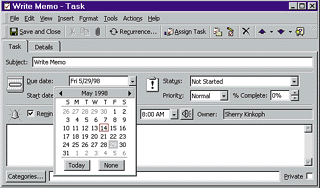
If the task has a due date, click the Due date drop-down arrow and choose a due date from
the calendar. (You can also enter a start date, if needed.)
|
Step 4: Select a Status Setting

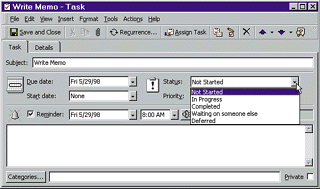
Use the Status drop-down list to select a status setting for the project: Not Started,
In Progress, Completed, Waiting on someone else, or Deferred. As you manage your task
list, you can update the status as needed.
|
Step 5: Set a Priority

Use the Priority drop-down list to give the task a priority level: Normal, Low, or
High. Use the % Complete box to specify a percentage of completeness, if needed.
|
Step 6: Enter Notes

Use the Notes box to enter any notes about the task. When you have finished filling
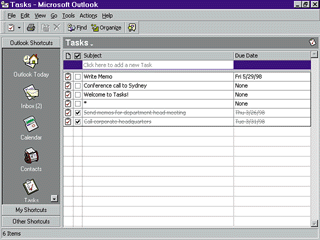
out the Task form, click the Save and Close button. The task is now added to your Tasks
folder's task list, as shown in this figure.
|
