Introduction
Outlook's Journal feature can help you track chronological events, such as when you
completed a job-related task or placed a call. Logging journal entries can help you
track past happenings, but only if you're consistent in logging entries. Outlook can
help by automatically logging entries for email messages, faxes, meeting requests,
and tasks you assign to others. One of the most useful aspects of the Journal is to
log phone calls you make, especially when you need to note details about conversations.
|
Step 1: Start a Journal Entry

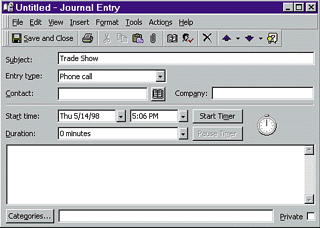
To create a manual entry, open the Actions menu and choose New Journal Entry or
click the New Journal button on the toolbar. This opens the Journal Entry window.

|
Step 2: Fill In the Form

Like the other windows used in Outlook, the Journal Entry window acts like a form;
it has fields you can to fill in with information about the entry. Start by clicking
in the Subject text box and entering a title for the entry.

|
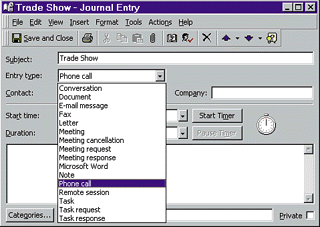
Step 3: Select the Entry Type

Click the Entry type drop-down arrow and choose an entry type from the list, such
as Phone call.

|
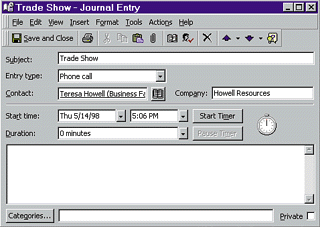
Step 4: Enter the Contact

If the entry is about a particular contact or company, enter the names in the Contact
and Company text boxes.

|
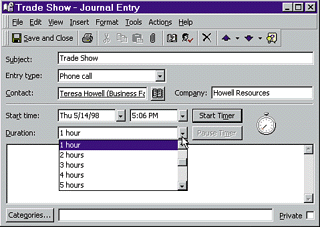
Step 5: Record the Time

Use the Duration drop-down list to specify the amount of time spent on the journal
activity. To let Outlook track the time (logging a phone call), click the Start
Timer button.

|
Step 6: Finish Details and Exit

Use the bottom text box to enter notes about the activity (such as logging notes about a telephone conversation). Click Save and Close to exit the Journal form and add it to the Journal timeline, as shown in this figure.

|
