Introduction
Outlook saves items you create in folders and subfolders. Email messages are saved in
the Inbox folder, notes are saved in the Notes folder, and so forth. When managing the
many items you create, you may want to organize items into different folders. For example,
you may want to store all the Outlook items related to a particular project in one folder.
You can easily create new folders and move Outlook items into them as needed.
|
Step 1: Open the Folder List

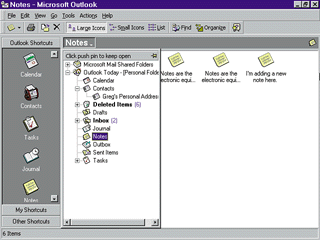
To see all the available folders that come with Outlook, open the Folder List.
Click the Folder name drop-down arrow, and then click the Pushpin icon in the
upper-right corner of the list to keep the list open onscreen.
|
Step 2: Choose a Parent Folder

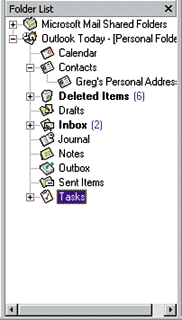
To create a new subfolder, first select the parent folder (the folder to
hold the subfolder). You may want a Sales Project folder, for example, to
be stored in the Tasks folder. First, select the Tasks folder.
|
Step 3: Open the Create New Folder Box

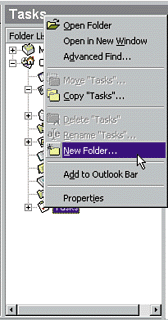
Right-click the folder to display a shortcut menu, and then select New Folder.
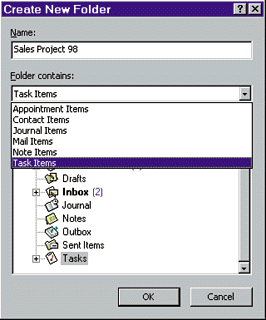
This opens the Create New Folder dialog box.
|
Step 4: Enter a Folder Name

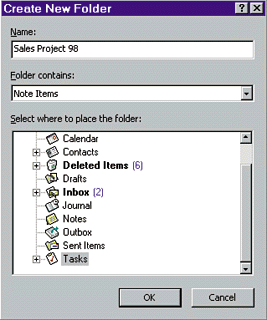
Enter a name for the new folder in the Name box.
|
Step 5: Select Items

Choose which items you want to store in the folder using the Folder contains drop-down list.
Click OK to exit the dialog box and create the folder.
|
Step 6: The Folder Is Saved

A prompt box asks if you want to save the folder as an icon on the Outlook Bar.
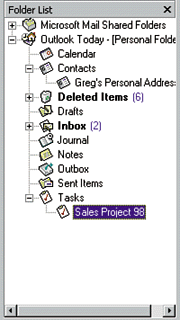
Click No. The folder name is now added to the Folder List.
|
