Introduction
Use Outlook's Calendar feature to keep track of appointments, events, and any other special
engagements. When you open the Calendar folder, Outlook displays your daily schedule in the
schedule pane, along with a monthly calendar pane and a miniaturized version of your TaskPad.
|
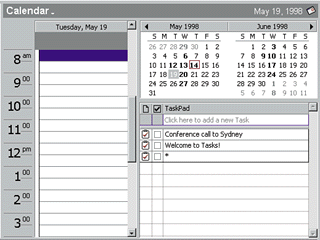
Step 1: Choose a Date

In the monthly calendar pane, select the month and date for the appointment. Click the date and the schedule pane changes to reflect that date.
|
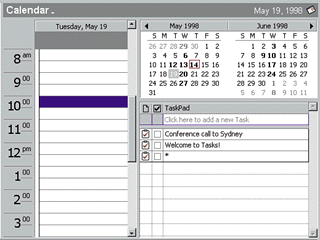
Step 2: Choose a Time
On the schedule pane, double-click the time slot for which you want to schedule an
appointment. This opens the Appointment window.
|
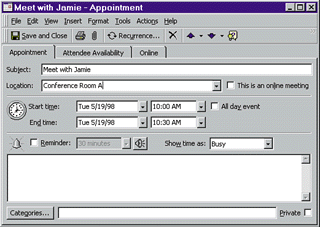
Step 3: Fill Out the Form
The Appointment window lets you enter appointment details. Fill out the Subject and
Location text boxes, the name of the person you're meeting with, and the place where
you're meeting. Click inside the text boxes, or use the Tab key to move from field to field.
|
Step 4: Enter Appointment Details
Use the Start time and End time drop-down arrows to set or change the date, time, and
length of the appointment. By default, Outlook schedules your appointments in 30-minute
increments, but you can easily set a longer time increment.

|
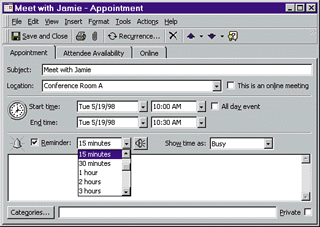
Step 5: Need a Reminder?
Select the Reminder check box if you want Outlook to remind you about the appointment
with a prompt box and an audible beep. Specify the amount of time before the appointment
for which you want to be reminded.
|
Step 6: Save and Close
When you have finished filling in all the details you want to include with the appointment,
click the Save and Close button on the Appointment window's toolbar to exit the form and
return to Calendar.

|