Introduction
The Personal Address Book is one of two address sources you have in Outlook.
The other address book is your Contacts list. Unlike the Contacts list, the
Personal Address Book enables you to create Personal Distribution Lists, which
are address groups that enable you to send a message to a large group of recipients
without accidentally forgetting to include a name.
|
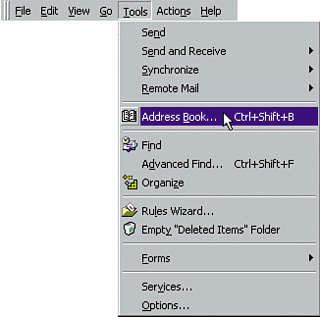
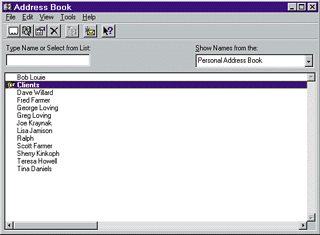
Step 1: Open the Personal Address Book

From the Inbox folder, open the Tools menu and select Address Book, or click the
Address Book button on the toolbar to open the Address Book window.
|
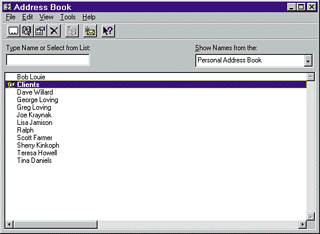
Click the New Entry button on the Address Book toolbar to open the New Entry window.
|
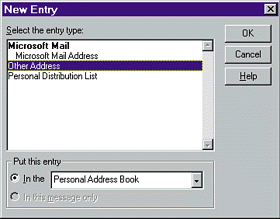
Step 3: Choose an Email Type
From the Select the entry type list box, choose the type of email address you're
adding and click OK. To add an Internet email address, for example, click Other Address.
|
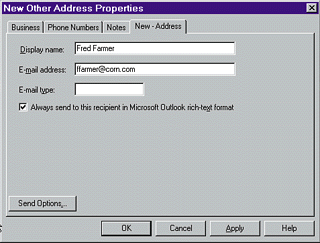
Step 4: Fill In the Information
Use the various tabs to enter information about the email recipient.
Enter the Display name (the name that appears on your messages), the
E-mail address (the actual email address), and the E-mail type (usually SMTP). Choose OK.
|
Step 5: Exit
When you're finished adding new entries, exit the Address Book window.
Click the Close button or select File, Close.
|